How to Install a Dash Cam: Your Ultimate Guide
While many people still haven’t hopped on board with the idea, the fact is there are a multitude of reasons to have a dash cam in your car. From protecting yourself against false allegations to lower insurance premiums, there are a variety of upsides to this vehicular inclusion.
However, what is even less talked about than the importance of having one of these devices is how to install a dash cam. While the concept of installing a dash cam might seem simplistic at first glance, the topic is actually deceptive in its depth and complexity. Therefore, understanding how to install a dash cam properly is a topic worthy of investigation and discussion.

If you have decided that having one of these devices in your car is a smart idea, congratulations. Here is everything you need to know about how to install a dash cam properly.
Shop Our Easy-to-Install Smart Dash Cam Options
How to Install a Dash Cam: Overview
While most people probably think that installing a dash cam merely involves suction cupping a camera to their windshield, in reality, there are multiple steps involved to properly complete the project.

Those steps include:
Determine Camera Placement
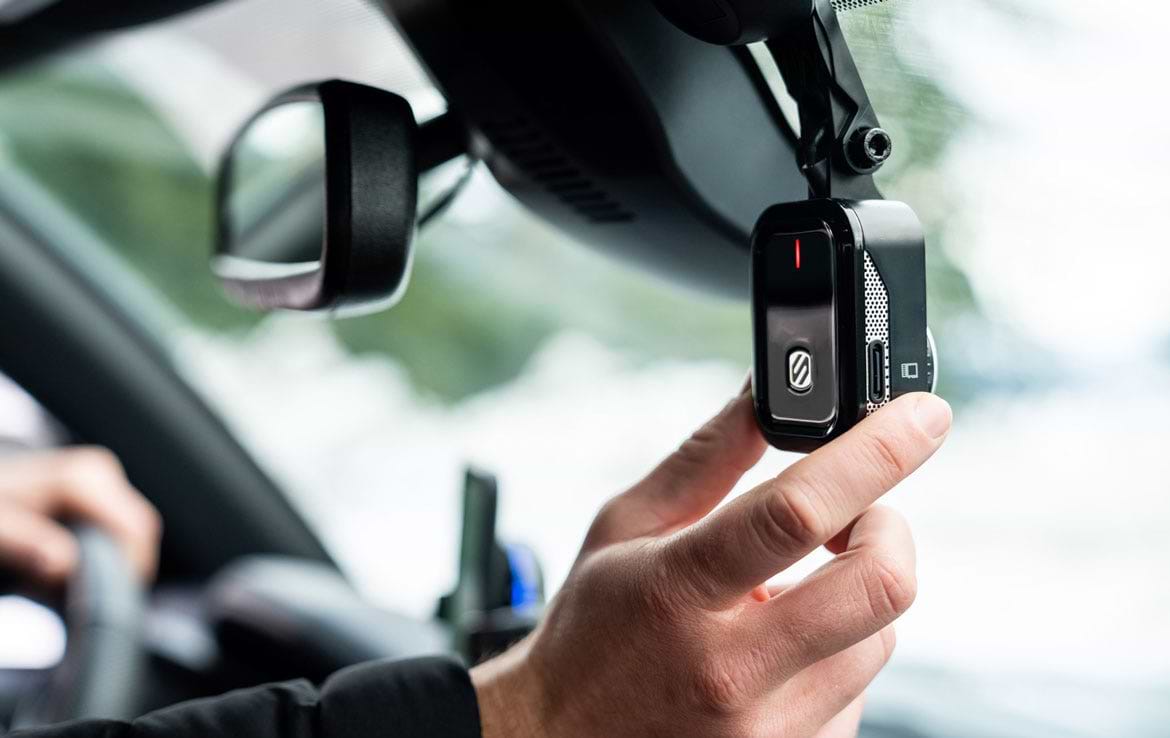
When purchasing a car dash cam, the device will likely come with either a suction mount or a semi-permanent adhesive. Therefore, if it is coming with the former, you can try it out in a few different locations to see what works best for you. However, if it comes with the latter, then you will need to consider placement more carefully so as to only have to move it once, at the maximum.
When placing the dash cam, it is important that you mount it as close to the car’s centerline as possible to get the maximum field of view from both sides of the car. Moreover, there are a variety of dash cam laws by state that have to do with obstructing the driver’s view of the road, which means that you will want it to be as unobtrusive as possible (and abide by your state’s laws).
This means that one of two locations will work best (and be legal) for drivers:
- Near or behind the rear view mirror
- Low down near where the windshield and dashboard meet (and actually mounted on either the windshield or the dashboard)
Do know that if your dash cam has an interior camera integrated into it, then the higher it is, the better field of view it will have of the back seat. Also, do be sure when mounting this kind of camera that the rear view mirror does not obstruct its view. This means that the camera will likely need to sit slightly below the rear view mirror.
Align the Camera to the Horizon
For those who have purchased suction-mounted dash cams, this portion of the piece will not hold much relevance. Simply mount the camera and, if it requires adjusting, just try again until it is in the ideal spot and perfectly leveled.
As for those using an adhesive mount, the process can be a bit trickier as you only have one or two chances to get it right before the adhesive stops sticking as well as it did when it was new. Additionally, the curve of the windshield can make accurately placing the mount by eye deceptively difficult. Therefore, it is wise to use some tools to get the job done.
If your phone camera has a level function on it, this could prove useful in helping to mount the camera. Alternatively, some dash cams are equipped with install assistants that will showcase the correct orientation on the display or via a phone app.
If any of these aids are available, it is recommended to use them in the mounting process. If not, then you may have to resort to some more basic tools and tactics.
For instance, you might use a simple carpentry level and some painter’s tape to get the job done. In this instance, affix half of a strip of tape (horizontally) to the top of the level, place it in the ideal spot on the windshield, center the bubble and press the tape to the windshield. From there, simply roll the level away, detaching it from the tape and press the revealed bit of tape to the windshield.
Finally, using either of these methods as a placement guide, remove the protective plastic from the adhesive, carefully align it using the guide, press it down gently at first (in case it is slightly misaligned) and then firmly when in its proper place.
Run Cables
After mounting the dash cam, the next step is to run the power cables and any other necessary wires. As it stands, there are four different locations in the vehicle from which you can draw power, including the cigarette lighter, a powered rear view mirror, the vehicle’s fuse box or OBD port.
The fact is that there are different pros and cons to each of these locations and specific reasons why some folks might opt for one over the other.
How to Install a Dash Cam: Drawing Power
Depending on if you want your dash cam to operate when the vehicle is off, the type of vehicle you drive and other factors, you might opt for a certain method of drawing power. While some of these options might require an additional purchase (related to wiring kits), you can get the job done for relatively inexpensively.

That said, the most common ways to power a dash cam include:
Cigarette Lighter
Drawing power from a cigarette lighter is potentially the most popular method for people to use. Using this approach, users will simply plug the dash cam’s power cable into the vehicle’s cigarette lighter or USB socket.
However, it is important to be aware that this dash cam setup will usually only power the camera when the vehicle’s engine is running, meaning that the camera likely will not be on when the automobile is parked. Most modern vehicles are configured in this manner. That said, many older vehicles do feature an always-on cigarette lighter. Therefore, the camera’s status when away from a vehicle can vary based on what a user is driving.
Also, it is important to be aware that there are implications to this difference. For those with modern vehicles that have the cigarette lighter shut off when the automobile is off, this means that the camera will cease to record while you are away. Alternatively, for those who have always-on cigarette lighters, the camera will keep recording, but this will drain the car’s battery.
Depending on your intended use for the dash cam, this is an important dynamic to consider as it could influence the means you use to power your vehicle’s dash cam.
In addition to this issue, there are some other pros and cons that you must weigh and balance.
In the advantages column, dash cams powered via cigarette lighter or USB sockets are quick and easy to install. Furthermore, this means of powering the device is extremely portable. Therefore, if you need to transfer it to another vehicle, this can be achieved with minimal effort.
As for the disadvantages, in addition to draining the vehicle’s battery, this installation method is less secure, thereby making the camera easier to steal, lose or simply misplace. Furthermore, if the power cable does not fit snugly into the power socket, the connection can be loose and unstable, potentially causing you to miss out on recording vital moments. If this occurs, the purpose of the camera is essentially void.
Rear View Mirror
Many of today’s vehicles come equipped with powered rear view mirrors. As a result, dash cam users can often use this source to power their device. That said, if you are driving something a bit older, your rear view mirror might not be powered, thus eliminating this power possibility.
Assuming this is an option, since the dash cam is likely to sit close to the rear view mirror, this is a great source of power for many. However, for many dash cam models, it will likely be necessary to purchase a wiretap kit to plug into the mirror and keep the cord length at a minimum.

The fact is that this option is better for some than connecting the dash cam to the fuse box (which we will discuss next) as it avoids using long wires that, if installed incorrectly, could become obstructions.
However, using this method will also power off the camera when the vehicle’s engine is not running, which means that it will not record when you are not present.
If this is a problem, then you might want to consider hardwiring the camera into the automobile’s fuse box instead.
Fuse Box
As would be expected, this approach wires the dash cam directly into the vehicle’s fuse box. Much like the last option, unless you purchase a dash cam that comes with the necessary cables, you will have to buy a separate hardwire kit to complete this job.
As with the previously listed methods, there are advantages and drawbacks to this powering method as well.
Where advantages are concerned, connecting the dash cam to the fuse box enables you to keep the camera recording at all times. This means that you can maximize parking mode features your camera has or capture any robbery or vandalism that may occur. Furthermore, not only is this method of connection cleaner than via a cigarette lighter or USB outlet, but it is potentially more stable as well. If that weren’t enough, this method is also more secure, as it is hard to detach, thereby deterring potential thieves.
On the down side, hardwiring a dash cam into a vehicle’s fuse box takes longer than most other methods, is rather technical and can even be dangerous for certain people to perform. Moreover, if you don’t know what you are doing, you could potentially damage the vehicle, camera or both. Therefore, this method usually requires a professional to guarantee that the job is done safely and correctly. This also means that there are additional expenses attached to this approach to powering your dash cam.
Shop Our Extensive Dash Cam Collection
OBD Port
If you want something of a happy medium, then powering your dash cam through your vehicle’s onboard diagnostics (OBD) port is likely to be the best option. Going this route provides the same reliable connection as hardwiring it into the car’s fuse box with the ease of pulling the camera into a cigarette lighter or USB socket.
The automobile’s OBD port is typically located under the dashboard on the driver’s side but can sometimes be found near the center console or even on the passenger’s side of the vehicle.
No matter where the port is located, installation merely requires plugging one end of the OBD cable into the dash cam and the other into the port itself.
Much like the hardwiring method, this approach will enable you to keep the camera powered on, even when the vehicle is not, though this will drain the car’s battery. Additionally, it is a much faster, more cost-effective approach than hard-wiring.

How to Install a Dash Cam: Wrap Up
As you can see, there is a fair bit to know when it comes to installing a dash cam in a vehicle. Using this guide, you should now be able to choose the best dash cam and accessories for your particular needs.
Additionally, if you are looking to purchase a dash cam, Scosche has a wide array of different models and designs, as well as different attachments you may need for powering your camera.
Image Credits
Aleksandr Lupin/Shutterstock.com
BoxerX/Shutterstock.com
BoJack/Shutterstock.com
Let Geo Create/Shutterstock.com